How can it optimised your blog pages?
- No images 'call' on pages - Not like some of the LinkWidgets used.
- The 'call' for javascripts/iframe from 3rd party widget providers.
- Specify pages - Strong inter-page relation.
- Specify location for easy indexing - Under posts not under comments.
- Specify the amount of links in every post - posts internal/external links balance.
- Help in lowering your bounce rate - Visitors are most likely to click on related articles links.
We will not go to detail why this tweak is search engine friendly, because like the above, says it all. It is some of the many features that you can do in making your blog pages more search engine and user friendly. The point here is to keep your web visitors to keep on reading your posts/articles, and not just by reading your current articles. By doing this, it makes the relation between page browsing more effective and conveniently to users. If not, they will probably miss out any of your relevant pages. In another way, you will gain more exposure and quality visits and lowering your visitors bounce rate.
Tutorial
Javascript Call
- Go to your blogger page - blogger.com
- Go to Template > Backup/Restore - Save your current page in your PC.
- Go to edit HTML > Proceed > expand Widgets Templates
- Find this code </head> - You can also use F3 or Ctrl-F.
- Copy the code below before/above </head> in edit HTML.
<!--RelatedPostsStarts-->
<style>
#related-posts {
float : left;
width : 540px;
margin-top:20px;
margin-left : 5px;
margin-bottom:20px;
font : 11px Verdana;
margin-bottom:10px;
}
#related-posts .widget {
list-style-type : none;
margin : 5px 0 5px 0;
padding : 0;
}
#related-posts .widget h2, #related-posts h2 {
color : #940f04;
font-size : 20px;
font-weight : normal;
margin : 5px 7px 0;
padding : 0 0 5px;
}
#related-posts a {
color : #054474;
font-size : 11px;
text-decoration : none;
}
#related-posts a:hover {
color : #054474;
text-decoration : none;
}
#related-posts ul {
border : medium none;
margin : 10px;
padding : 0;
}
#related-posts ul li {
display : block;
background : url("http://www.gigaimage.com/images/brrl1rtaziisu0yj6kj6.gif") no-repeat 0 0;
margin : 0;
padding-top : 0;
padding-right : 0;
padding-bottom : 1px;
padding-left : 16px;
margin-bottom : 5px;
line-height : 2em;
border-bottom:1px dotted #cccccc;
}
</style><script src='http://bloggergadgets.googlecode.com/files/related_posts_compressed.js' type='text/javascript'/><!--RelatedPostsStops-->
The Automated Posts/rticle Link Script
- Now, find this code <data:post.body/> - use F3 or Ctrll-F.
- Copy this code and paste underneath/below <data:post.body/>
<!--RELATED-POSTS-STARTS-->
<b:if cond='data:blog.pageType == "item"'>
<div id='related-posts'>
<font face='Helvetica' size='3'><b>Artikel Berkaitan: </b></font><font color='#FFFFFF'><b:loop values='data:post.labels' var='label'><data:label.name/><b:if cond='data:label.isLast != "true"'>,</b:if><b:if cond='data:blog.pageType == "item"'>
<script expr:src='"/feeds/posts/default/-/" + data:label.name + "?alt=json-in-script&callback=related_results_labels&max-results=3"' type='text/javascript'/></b:if></b:loop> </font>
<script type='text/javascript'> removeRelatedDuplicates(); printRelatedLabels();
</script></div></b:if>
<!--RELATED-POSTS-STOPS-->
- Click Preview and wait if page parsed correctly.
- If no errors, press Save and you're done.
 |
| Related Posts Automated Links |
Additional Note:
- Change the title of the links by changing the highlighted words above.
- Change the frequency of your post links, by changing the number highlighted above.
- Important to organise your posts as the automated links produced is based on your Posts Labels articles and posts.
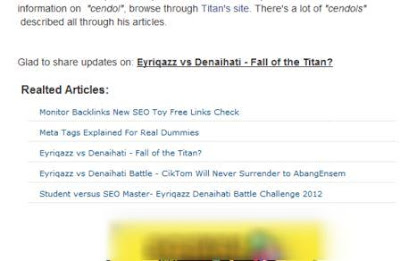
- Your links location will look like screenshot.
The tweak above is tested and suitable for blogspot blogger platform using Wordpress Themes and any blogspot customised templates. The links generated from your previous title posts (articles) in your selected labels. You can call as many links required by changing the frequency as stated above. And again, for better page optimisation, try to balance the amount of links internally and externally. Thanks for the support from bloggerstop.
However you must consider, as SEO page optimisation is like life, at one time you'll be at the top, the next, you will just fall. But by tweaking and updating your web pages, you won't be far behind.
Updated August 2012: The javascripts (highlighted in blue) had a few glitches lately. But the ultimate blogger widget guru from bloggerplugins had updated the related post to labels links and now it is working accordingly.

